Containerize a go web application
[golang docker devops redis Go is getting more and more popular as the go-to language to build web applications. With this post, I hope to show you how you can containerize a web application written in Go.
The App
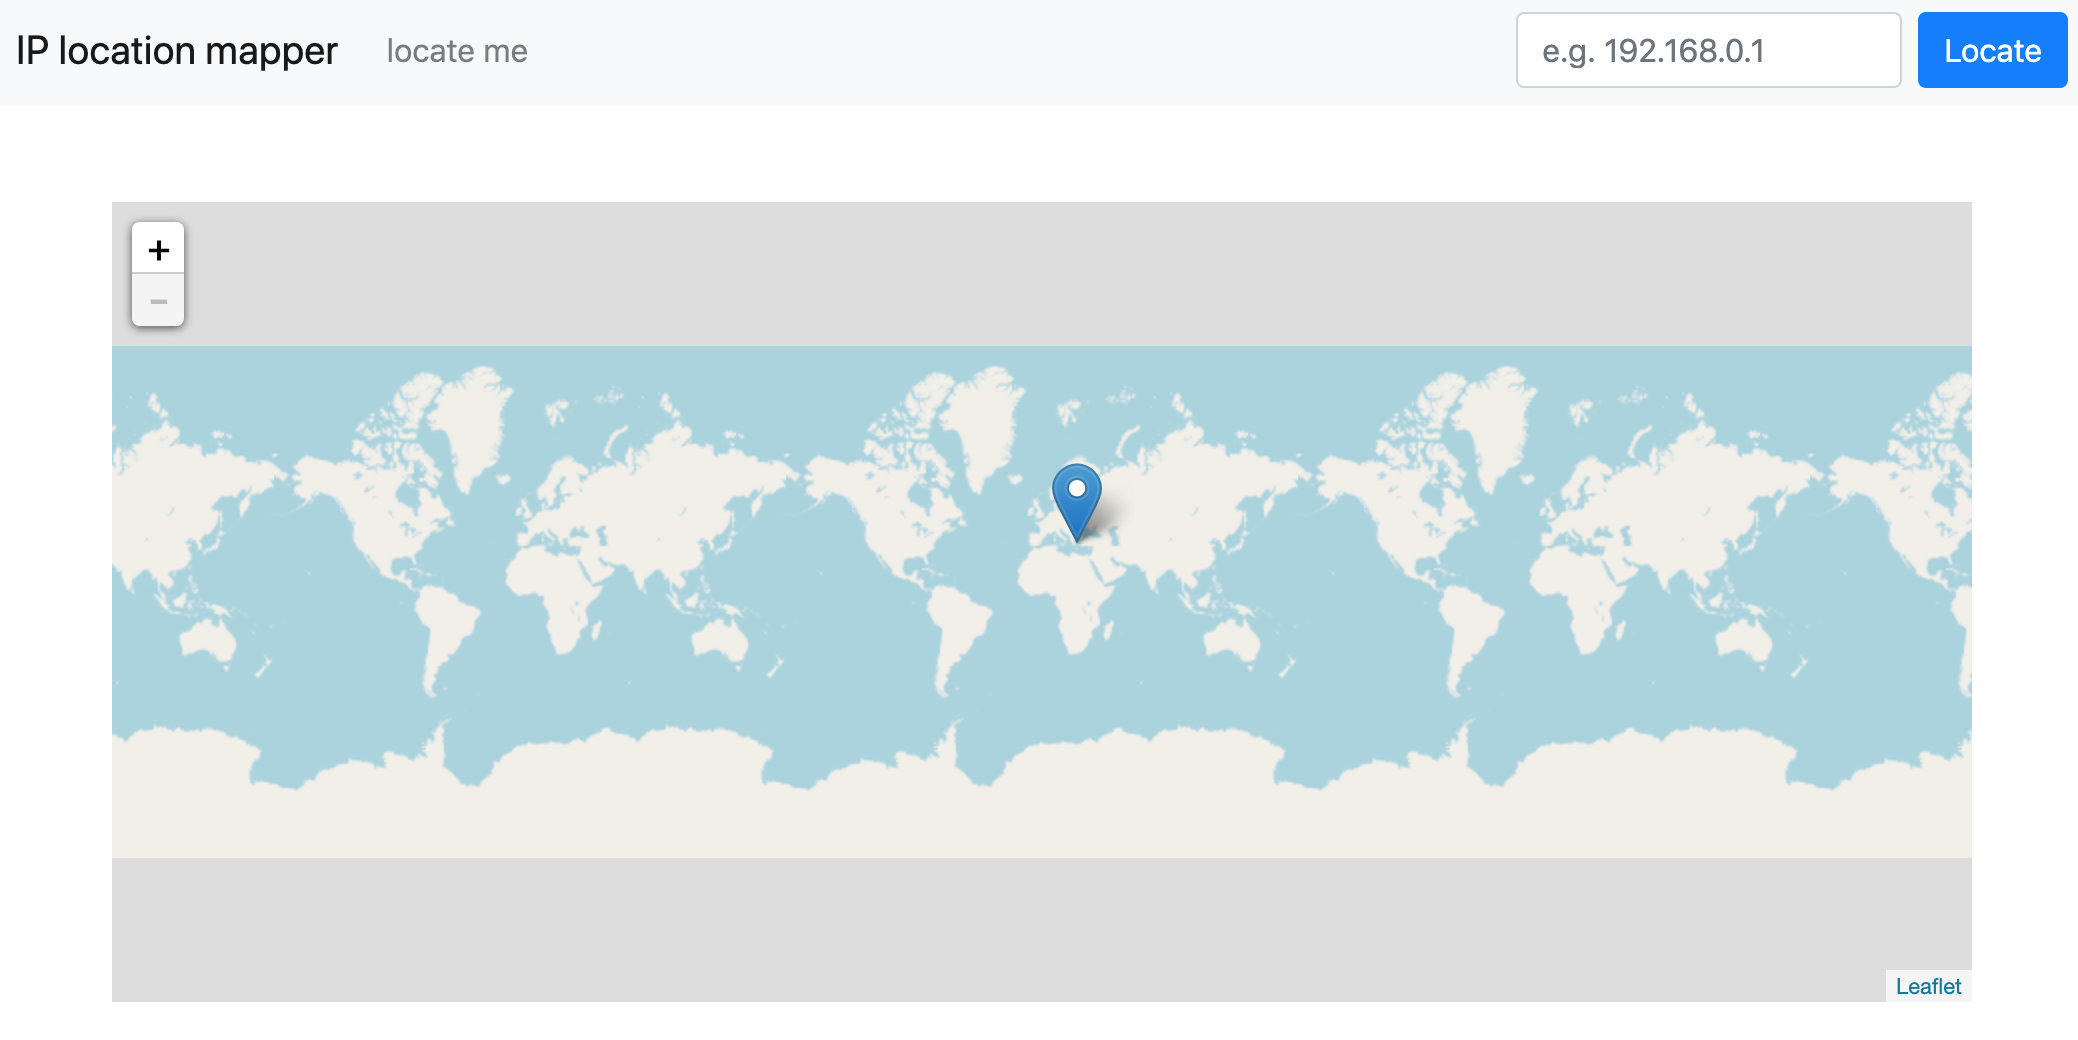
I’ve written a go web application called IP Location Mapper which helps find the location of any IP address. It performs an API call to ipstack.com to fetch the location of the IP address. ipstack.com provides 10,000 API requests free per month.
 |
|---|
| web application home page |
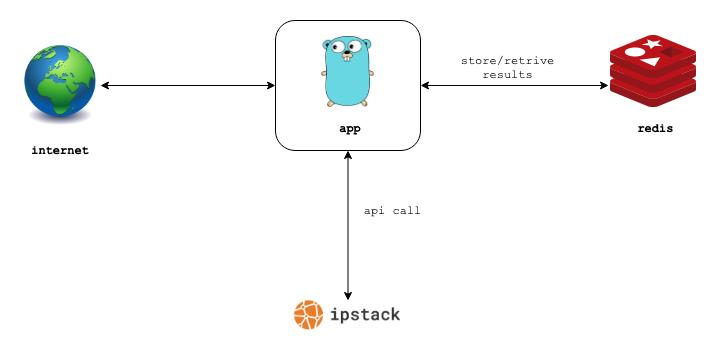
Once the API request is made, the response is stored in a redis cache with a TTL of 24 hours for faster retrieval and thereby avoid the expensive API call (also remember, we have only 10,000 free requests).
 |
|---|
| architecture |
You can clone the repository here.
Get a free api key from ipstack.com
We would need an API key from ipstack.com for this application. You can sign up for free here. Your API key will be available in the dashboard.
 |
|---|
| api key in ipstack.com |
Not don’t be cheeky and try to use my api key, I’ve already reset.
Dockerfile
The Dockerfile for the application has comments in each line stating their intent. Run the below command inside the project to build an image tagged as jeshocarmel/ip_location_mapper.
docker build -t jeshocarmel/ip_location_mapper:latest .
The ‘ . ‘ at the end of the command indicates that you are building the image from the current directory. So make sure you are inside the project folder when you run the command.
Compose
Compose is a tool for defining and running multi-container Docker applications.
redis service
- line 3 - create a service named redis.
- line 4 - pull a redis image from docker hub.
- line 5 - Run a one-off command on the pulled redis image. Here we pass the command to start the redis server with a password from a .env file (explained later).
- line 6,7 - open port 6379 for application access.
- line 8,9 - pass environmental variable required for this service.
- line 10 - run the container with name as ‘ip_location_mapper_redis’.
app service
- line 11 - create a service named app.
- line 12 - the build represents that this service an image to be built from the current directory (.)
- line 13 - the image which has been built to be tagged as ‘jeshocarmel/ip_location_manager’.
- line 14, 15 - this service depends on the earlier redis service.
- line 16, 17 - open port 8080 for web access.
- line 18 - environmental variables for this service are listed line by line here.
- line 19 - The redis host which the application needs to store/retrieve data is listed here. In docker-compose you can reach a service by simply mentioning the service name.
- line 20 - Pass the redis password we used to start the redis service. This will be loaded from a .env file (explained later). The app will use it for authentication with the redis service.
- line 21 - Pass the API_KEY from ipstack.com. This will be loaded from a .env file (explained later).
- line 22 - run the container with name as ‘ip_location_mapper’.
.env file
By default, the docker-compose command will look for a file named .env in the directory you run the command. So create a .env file in your project directory and copy lines from the file below. Replace the IPSTACK_API_KEY with your API key from ipstack.
Running the application
docker-compose up --build
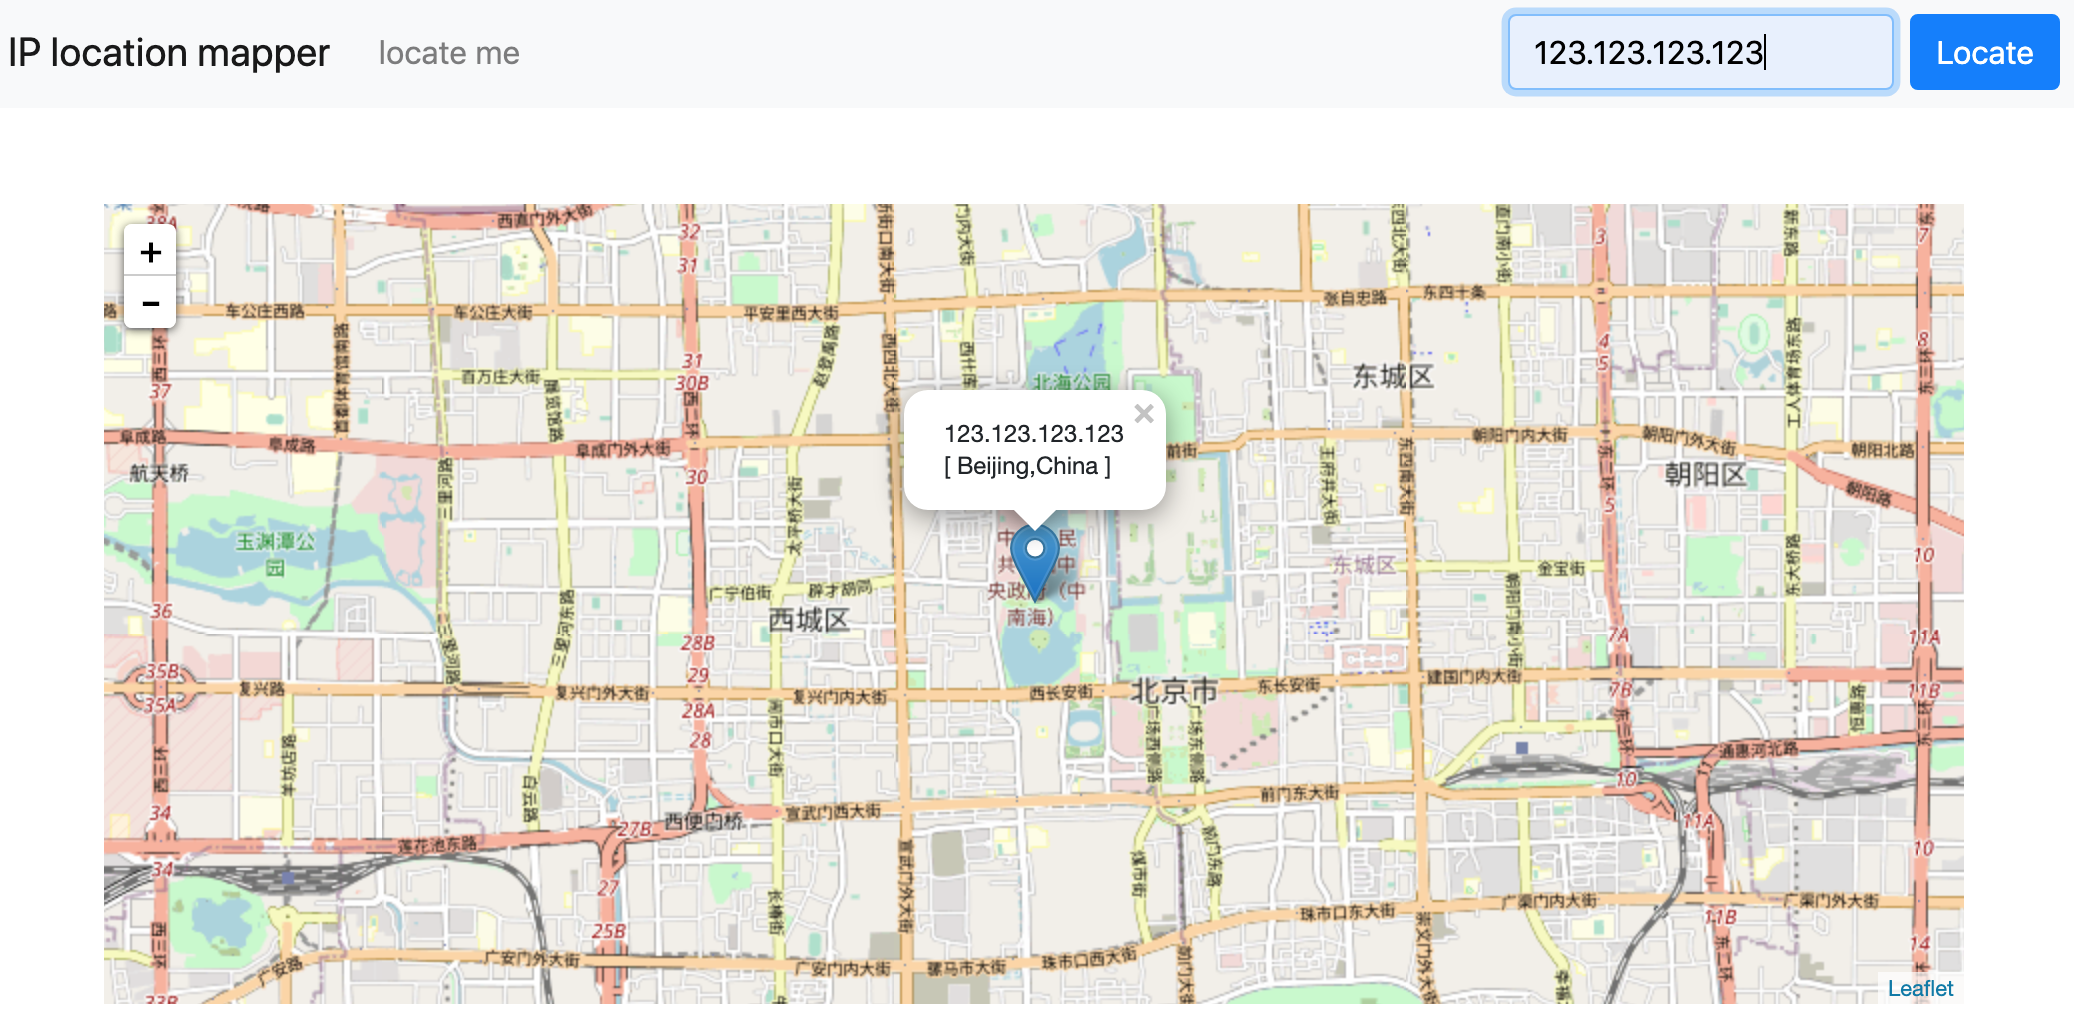
Thats all you need to start the application. Go to http://localhost:8080 on your local machine browser and you should be able to see the application up and running.
 |
|---|
| an ip search from the app |
run docker ps in your command line and you should be able to see two containers running.
![]()
Next steps
In the next post, I’ll write on how to deploy the application in kubernetes with minikube.